Workflows
Workflows are the functionality of the page. They are designed as no code components, coding can be added for specific functions using the Workflow Block (WFB) Execute Script.
Workflows can be activated using page events, elements events, or based on scheduler triggers.
Service Side
To use service side workflow block, please navigate to the data section in the settings area and then select workflows followed by service side workflows.
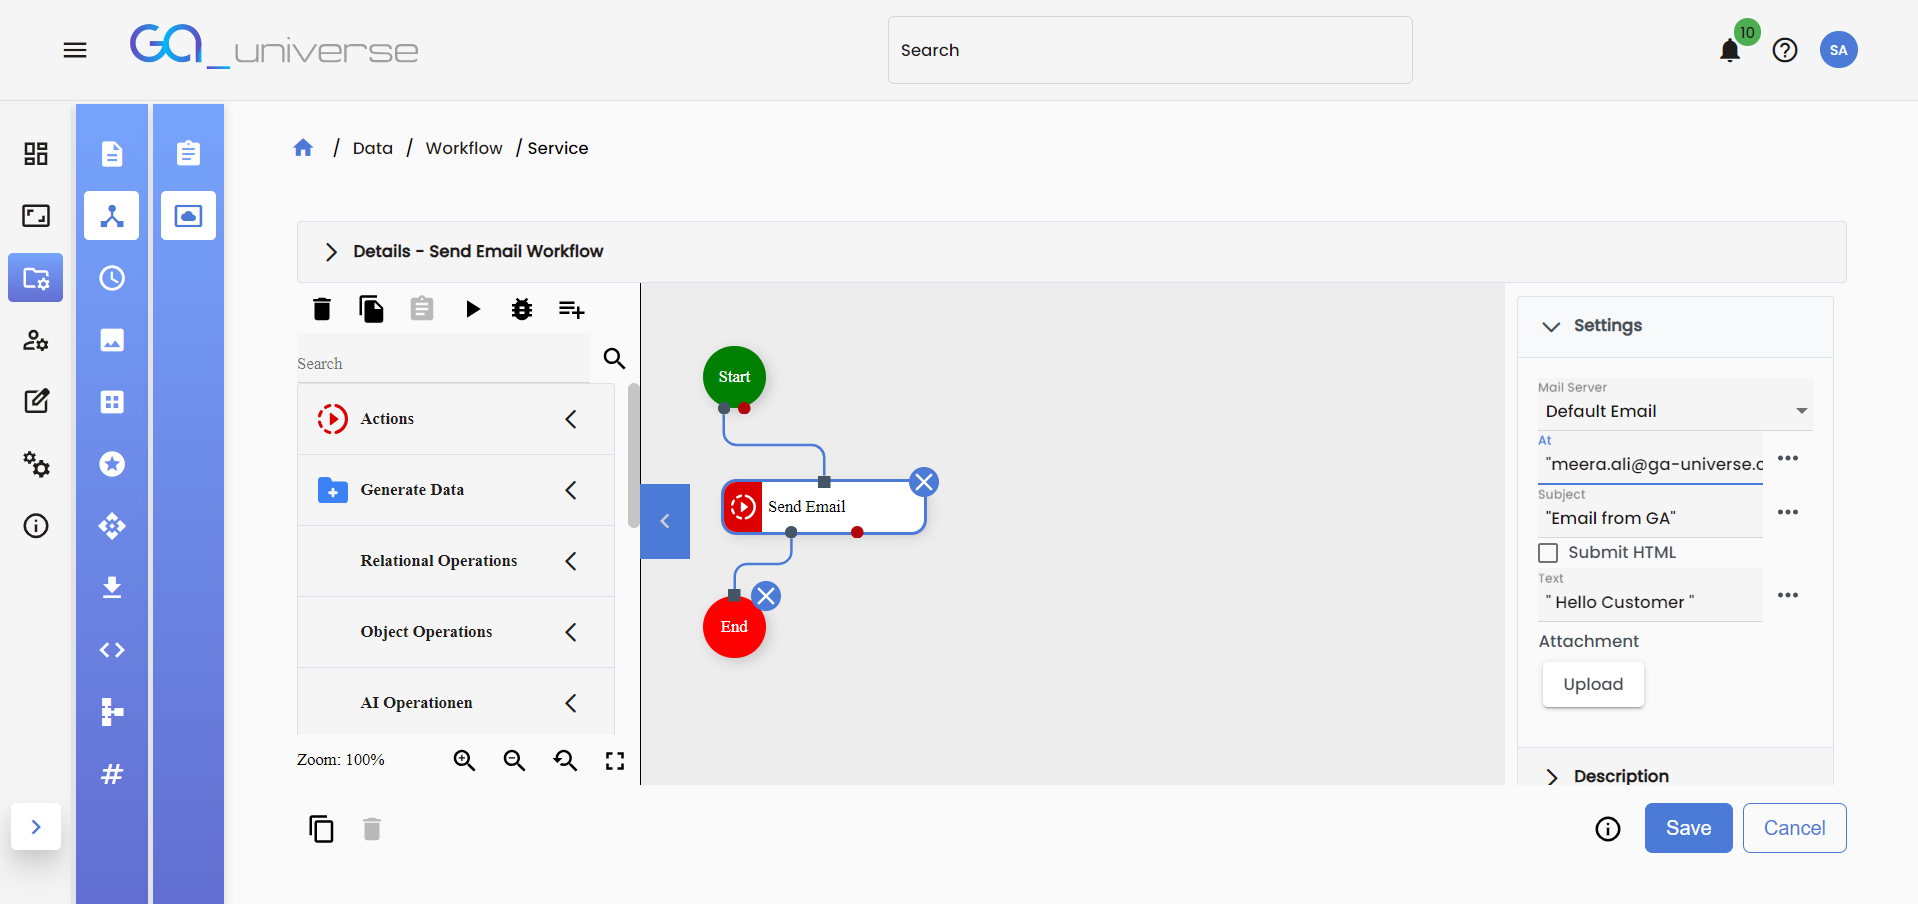
In this example we will be creating a workflow that sends an Email to a user. For this example, we assume an email server has already been set.
- Drop a Send Email WFB, and assign the following values which are needed:
- Select the Mail Server as “Default Email”
- In At field, please add your email address in quotation marks
- Write your subject in quotation marks
- Write your text in quotation marks
- Save your WFB.
That's it, run it by clicking on the play button, and wait for the email to be sent!
Note: All changes made are saved locally on your account, and are not visible to the all other users. To make them visible to all users please accept the changes in the ChangeLog Overview in the settings
Client Side
Here is an example where client side workflows are used to read the value of a textbox and display value as a message to the user
Navigate to a page, and open the app builder
Note: When you open the AppBuilder, please select edit mode and not view mode. When you select the edit mode the page becomes locked and you are the only one allowed to change it until the changes are accepted in the ChangeLog.
Modify the base grid's properties, and change the row definition to add a new row and column
Add a textbox in the first row and first column and modify it's properties to make it editable. You can also change how the elements look and customize them to your liking
Add a button in the first row, second column
Create the workflow by navigating to the workflow tab and clicking the + button
Once inside the workflow editor:
Drop a read values WFB from the layout category
Choose the textbox element and assign it a status key (Status keys are like a local variable for the workflow)
Save the WFB
Drop a show message block from the actions category
Modify the block properties to show the status key assigned earlier (Text needs to be inside quotation marks "", status keys don't need to be inside quotation marks)
Name the workflow and save it
- Click on the button in the first row, second column, navigate to the element events tab, toggle the mouseClick event and bind it to the previously created workflow
- Save the app and close the AppBuilder
Now try it out! Add text in the textbox and click on the button, and a message box with your text should pop out.
You can explore and try different things in the workflow editor! Try to create a similar workflow that validates if input equals to a certain value and print a specific message respectively (Hint: use DataSwitch WFB)
Note: All changes made are saved locally on your account, and are not visible to the all other users. To make them visible to all users please accept the changes in the ChangeLog Overview in the settings.